Thursday, October 13, 2011

Cool Stuff Review - Discover Wilderness Survival Playing Cards!

On our last trip to the Adirondacks, we stopped at a couple of souvenir shops so I could pick up a window sticker for my car. Sitting there on a shelf in one of them was something called "Discover Wilderness Survival" Playing cards! Since I almost always have a deck of cards in my kit, and I believe that anything I carry should be multipurpose, I decided to spend the $6.00 and check them out.  I wasn't sure exactly how you could fit a wilderness survival manual on a deck of playing cards but when I opened them up I was pleasantly surprised at the content.  Each card has a different survival strategy on it, with titles such as "Survival Basics", "Signaling for rescue in the wilderness", "River Safety" and even... "How to wrestle free from an Alligator"!!!  Certainly fun to read! All in all I was impressed with the amount of data on the cards, the print is small and I would have liked to see more diagrams and pictures, but the information looks good.  I didn't see anything new or any bad advice, just good basic survival information.  I was also very happy to see they are printed in the U.S.A.  When I checked out the manufacturer Sea to Sky Photography at http://www.seatoskyphoto.com/ I saw that they have a whole line of photo playing cards with Birds, Animals, Marine Life, etc.  I just may have to check a few more of them out.
So I'll be swapping out the ratty old deck of cards in my kit with these because here in the Northeast, you never know when you may have to wrestle free from an alligator!
Thanks for reading and enjoy the outdoors,
N.E.V.

Friday, October 7, 2011

5 Questions with Craig Cole from The Outdoor Podcast.

Welcome to the start of a new semi-regular feature here on NortheastVoyageur.com called “5 Questions”. When I find someone who is doing something new, different or interesting that I think should be shared with others, I'll email them 5 questions and (with their permission of course) post their answers on here with links to get more info. Craig Cole is the creator of The Outdoor Podcast, a podcast I discovered a few months ago and now listen to on a regular basis. His enthusiasm for the outdoors is inspiring. I emailed Craig, introduced myself and asked if I could interview him for this blog. He graciously accepted and will be our first featured interview. So without any further adieu...


5 Questions with Craig Cole from The Outdoor Podcast.

Tell us a little about yourself and why you decided to start the outdoorpodcast.com?

I grew up in West Virginia and have enjoyed various outdoor activities since I was a kid. In fact, my family has lived in West Virginia for so long, that we lost our family origins. I figure my family lived in West Virginia for so long that it was no longer an issue as to where we came from originally. So far, I've gone back to six generations all living in West Virginia. I started camping and hiking as a kid and as I've gotten older I've continued to build upon this outdoor foundation with various outdoor interests.

In the summer of 2010, I traded my Blackberry for an Android and started researching podcasts based on my interests. The first podcast that I found was The Survival Podcast and really enjoyed it. I quickly became disappointed in finding outdoor related podcast because most of them were no longer being updated. I decided to follow Jack Spirko's advice to follow my passions and start a podcast based on all my outdoor interests.

What kind of feedback are you getting from the listeners of your podcast?

I've been totally blown away by the feedback that I have received so far. The feedback so far has been very encouraging and positive, with the majority of it being questions that people have for me to give them outdoor advice.

You often talk about getting families involved in outdoor pursuits, what is one piece of advice you'd give a family who is thinking about getting outdoors?

The biggest piece of advice that I can give to families is to just get out and do something in the outdoors and make sure you take the kids along with you. Right now our society is jammed pack with stress and busyness and there is no better way to relieve yourself of stress than to get outdoors.

Canoeing is obviously one of your passions in the outdoors, what advice would you give to someone who is interested in, but hasn't started canoeing yet?

My wife and I absolutely love canoeing and learning to canoe was one of the best decisions we've made as a couple. The way I got started in canoeing was by reading articles on canoeing and learning the different paddling strokes. Then we decided to rent a canoe for a few hours on a local river to see if it was something that we would enjoy. By the end of the day we ended up buying a brand new canoe. Now we have YouTube that makes learning to canoe that much easier. If you've never canoed before, it's definitely best to rent a canoe for your first trip, just to make sure it's an activity that you'll enjoy.

Finally, do you have a favorite outdoor tip or trick that you use on a regular basis you'd like to share?

The best tip that I can offer is to make sure you are prepared for anything. I've been stuck in mud on top of a mountain by myself, been caught in crazy thunder and rainstorms and had a flat tire in the middle of nowhere on a rutted out trail. By making sure you carry at least a 10 piece kit with you every time you are in the outdoors, you will be better equipped to handle a bad situation.


Craigs' podcast is available on iTunes and from his website at www.outdoorpodcast.com. Please take a few minutes and check it out.


Thanks,

N.E.V.

Sunday, October 2, 2011

Basic Leatherwork - Part 2

Here's part 2 of doing some basic leatherwork.  This time we'll make a simple sheath to hold a pocketknife.  The knife I picked was a Opinel but the basic design could be modified to fit folding knives, flashlights, etc.

We'll start by laying out everything we need.  Since I'm extremely cheap and like to make as many of my own tools as I can, You can see my 4 prong "Leather Punch" was formally a heavy duty fork purchased at the Salvation Army for 25 cents.  I just flattened it out, sharpened up the tips and wrapped some tape around the end.  It allows you to punch 4 holes at once and helps to keep your stitches straight.


The leather were starting with is approx. 3 and 1/2 times the length of the knife. Here we fold it into and "S" shape and put a clothespin on it to hold it together. This forms the pocket for the knife and the loop for the belt.

Here's the sideview.


Now we'll mark where the leather overlaps itself, this is so we know where to put our stitching.

Now we'll lay out our leather strap and and mark the lines..  Make 2 lines with either chalk or a pencil where you want the stitching to go. You can either punch the stitch holes by hand with an awl or use our homemade stitching punch.


Now we start stitching, start by sewing one way, then reverse and start sewing the other direction which will double up the stitches. When you finish, don't worry about knotting it, just go back through a few previous stitches, pull it tight and cut it off.  It won't unravel.


Here's both sides of our sheath after the stitching is done.


Now we'll mold the sheath to fit the knife, Just like the previous tutorial, we soak the leather for a few minutes in warm water.  This time we'll take the knife, wrap it up in some plastic wrap to protect it and put it in the sheath.  It should fit tightly. Set it aside and let it dry.


After it dries, remove the plastic wrap from the knife and Taa Daaa.... You now have a homemade sheath that is custom fit to your knife.  If you like a more finished professional look, you can round the edges with some sandpaper and rub a candle along them to wax the edges.  I like the homemade look so I'll leave this one as it is.


Professional leather workers would probably laugh at some of these techniques, But who cares.. We've just made ourselves something useful that will last a long time.  Give it a shot and let me know how and what you decide to make.

Thanks for reading,
N.E.V.

Wednesday, September 28, 2011

Quick Camp Tip - A Camp Hanger


When I setup camp, I like to keep my gear up off the ground as much as possible.  I don't think we should be driving nails in or breaking branches of of trees just to have a place to hang a jacket or pack.  
One of the first things I do when I setup camp is find a couple of sturdy forked sticks laying on the ground and make a couple of gear hangers.  I just cut the forked part of the sticks off and split them down the middle. Securely lash the "Hanger" to a nearby tree about chest height and presto... Instant hanger for anything you want off the ground.  I usually end up hanging my pack first to make it easier to get everything else out to setup camp.  With practice you can have a couple of hangers ready in a few minutes. 
When you head out, just untie the hanger and toss the rope in your pack with no damage to the tree. Give it a shot and let me know how It works for you.

Thanks for reading,
N.E.V.

Sunday, September 11, 2011

Basic Leatherwork - Part 1

I thought I'd do a couple of leatherwork tutorials, it's something that I haven't really touched on before and thought it'd be fun.  I am by no means an expert working with leather, I can and do make a variety of items such as sheaths, bags, etc. This first project is an easy one, a simple laced together bag that takes minimal tools and time.

   
We'll start by grabbing a scrap of leather and a couple of leather laces, the only tools I'll use are a leather punch, some heavy duty scissors and a pair of needle nose pliers.


Draw out the shape of both sides of the bag on the back side of the leather.


Cut it out just outside of the pencil lines, it doesn't have to be perfect, just close.


Here I have folded it over and cut it in half, making the two sides of he bag.


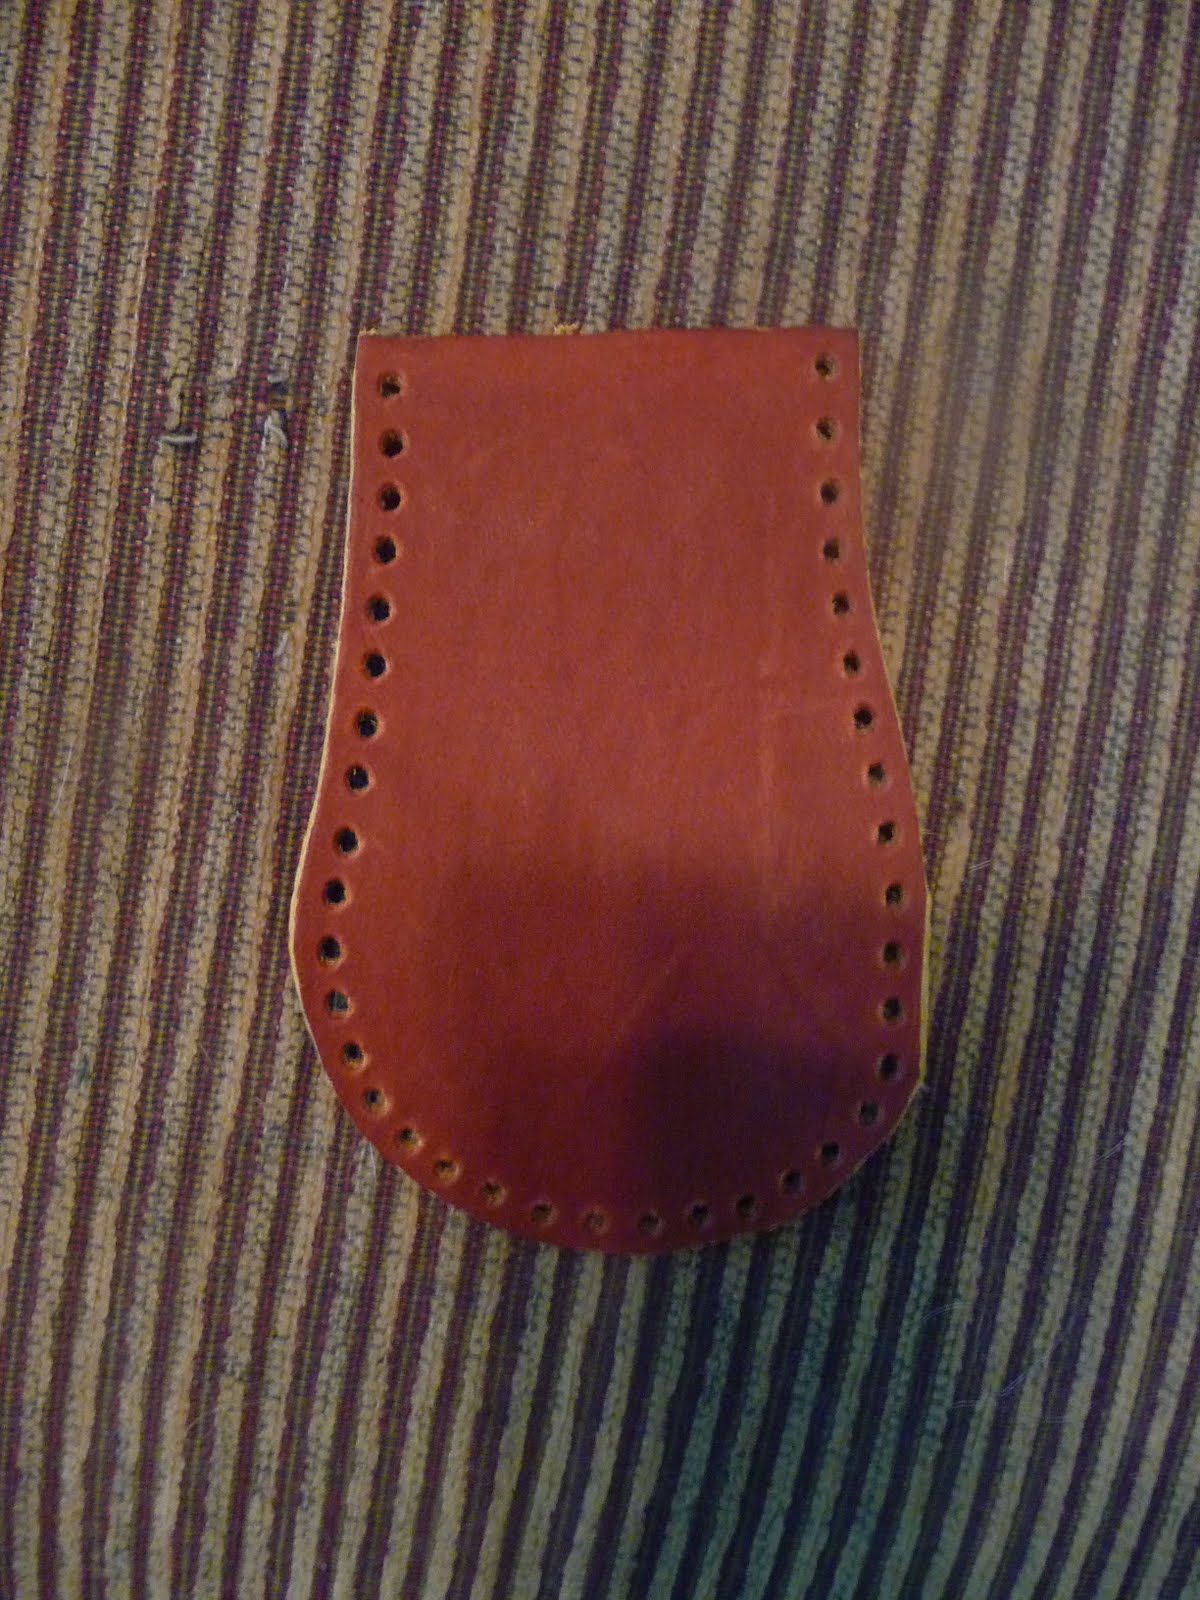
Punch holes in one side of the bag, Try to keep them as evenly spaced as possible, although they do not have to be perfect.


Lay the fronts of both sides together and mark the holes on the unpunched side.  Again it doesn't have to be perfect but you'll want to make sure you have the same amount of holes on each side.


Holes punched in both sides.


On this bag I started lacing on the second hole down, I'll leave the top holes for the strap.  Knot one end of your lace and start lacing.  Tightening the lacing every so often.


Here's the bag laced up and with the strap attached, I slid the strap through the top two holes and knotted both ends. My lacing wasn't long enough to lace around the entire bag in one piece so I used two, knotted them at the center bottom and left them long for some fringe. If your lacing is long enough, you won't have to do this.


Now we have a flat laced bag, here's the part that gives it some shape and makes it easier to get things in and out of it. Take your new bag and run it under some warm water, making sure it gets soaked.  Go out to your driveway, creek or whatever you have and pack the bag full of small gravel or clean sand.  Work the gravel or sand in tightly and you'll notice the leather start to stretch.

Find a warm place to hang it up until it dries.


After the bag is dry, dump out the gravel or sand, it should hold it's shape now. Treat the bag with some neatsfoot oil or beeswax and your done.


That's it, a simple leather project that can be completed in less than an hour (not counting drying time). Next time in Part 2, we'll go over some simple stitching and make an open sheath for a pocketknife or flashlight.


Thanks for reading,  N.E.V.

Monday, August 22, 2011

New Section Added - The Photo Gallery

Hello Everyone,
I just added a new tab at the top of the page for a new section called "The Photo Gallery". I've put some Pics in there from our most recent trips to the Adirondacks.  I'll be adding pictures periodically in there now, instead of the Home page. Hope you enjoy looking at them.
Thanks for checking it out.
N.E.V.

Sunday, August 21, 2011

Welcome to www.northeastvoyageur.com

Hello everyone,
Just a quick update... I finally purchased www.northeastvoyageur.com for this site.  If you have any links pointing to www.northeastvoyageur.blogspot.com they will still work and will automatically redirect to the new site. It may take a couple of days for everything to "catch up" on the internet, so if northeastvoyageur.com is not available right away, the old blogspot address will still work. I will be making some changes over the next few days with new email, features, etc. so keep checking back. I do appreciate everyone taking the time to check out this blog.
Thanks for reading,
N.E.V.